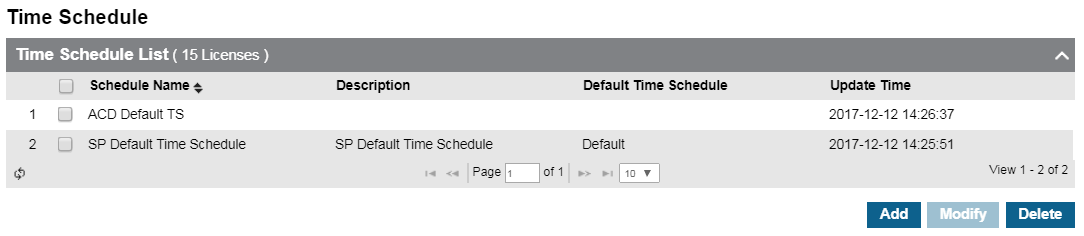
Time schedules define the operating hours of a customer and can be defined for their entire company or at a site level.
You can make one schedule the default schedule. By default this is assigned to the entire company (all sites); but can be overridden to use another schedule at the site level under Site Management.
View schedules
- Expand Company and click Time Schedule to see all schedules that have been created.
Add schedule
- Click Add.
- Describe the new schedule:
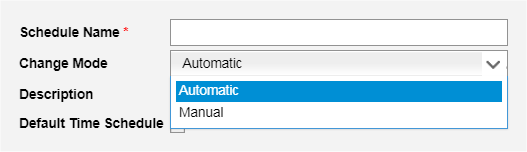
- For Change Mode, select Automatic to follow defined hours or Manual to override the defined hours and force a particular path, Day, Night, or Timed, to be followed for call routing purposes.
- Please review Customer Manager -> Call Manager -> DDI Summary to verify call paths exist for the desired period.
- Check Default Time Schedule to make this the default schedule.
- Click the Schedule tab:
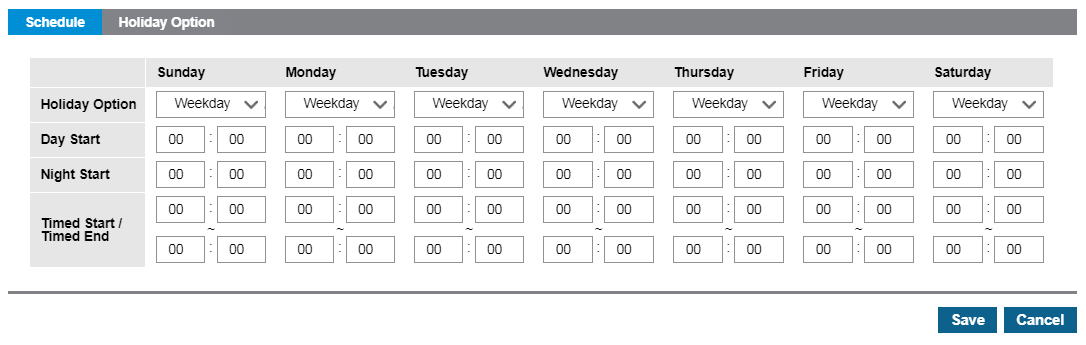
- For each day in the schedule, you can set the following options.
- Holiday Option: This has two options.
- Weekday: This is the normal setting and will follow all predefined holidays and defined hours for the day.
- Holiday: This is an override setting that does the following.
- All Start and End values will be disabled.
- Calls will be forced to their Night destination (if one exists).
- The 'System Service Time Mode Change' feature cannot override this setting.
- Specify the Day Start and Night Start using the format hour:minute. For hour, enter 00-23 and for minute enter 00-59.
- Recommendation: For companies that are closed the on the weekends, set the Day Start to 00:00 and the Night Start to 00:01 for those days.
- Timed Start / Timed End is an optional setting for a given day. Most often, this is used for offices that are closed during a lunch hour.
Add holiday
- On the Holiday Option tab, click Add.
- NOTE: These dates are NOT actually referenced if the 'Holiday Option' in the schedule is set to 'Holiday'.
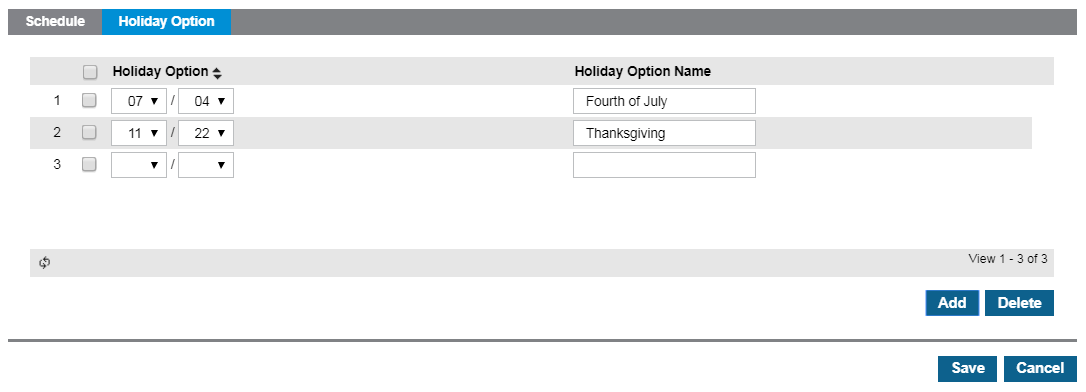
- Select tholiday's month and date from the Holiday Option dropdowns.
- Recommendation: It is typically best practice to configure all the holidays at the start of a given year, including the next year's New Year's Day.
- Enter the Holiday Option Name.
- Click Save.
