The SPA 112 connects 2 analog phones to a VoIP service provider.

SPA 112 Setup
- Connect the SPA 112 to your network according to the instructions included with the device. When the IP address is discovered, enter it in the address bar of a web browser to go to the Cisco Phone Adapter Device Configuration Utility.
NOTE: Attaching an analog phone to one of the ports, you can use the integrated IVR to obtain the IP address as follows:
- Go off-hook and press **** in quick succession.
- When prompted to enter the option, dial 110#; the IVR will then play the current IP address.
- Choose Quick Setup on the menu bar:
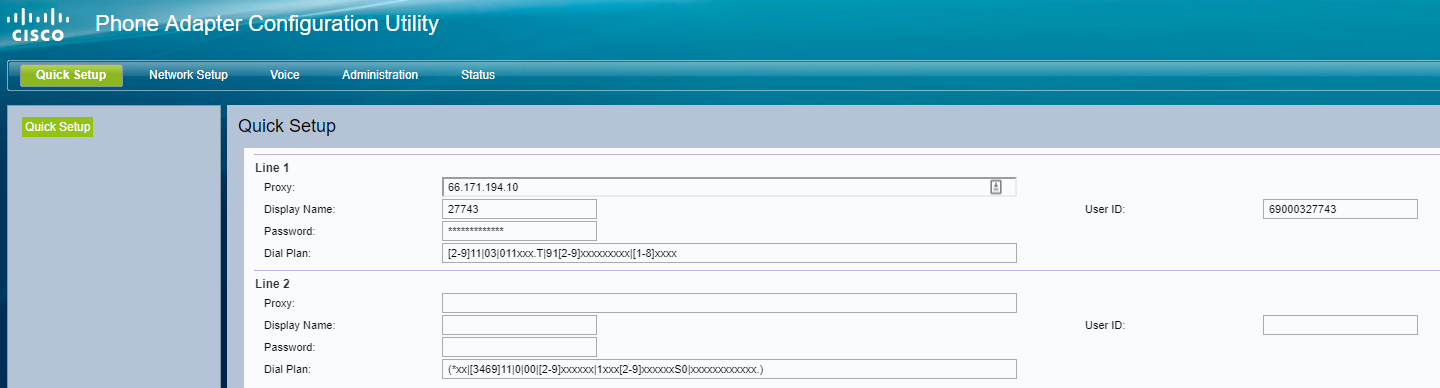
For Line 1, enter:
- Proxy: IP address of SBC 66.171.194.10
- Display Name: Extension number used for the SPA 112.
- For the values to enter for the following user settings, launch the iPECS Cloud Manager Console and choose User > User Setup. Select the user and scroll down to view the user's Device tab:

- User ID: Enter the User ID displayed on the Device tab in parentheses.
- Password: Password entered when this user was created in User Setup.
- Dial Plan: Using [2-9]11|03|011xxx.T|91[2-9]xxxxxxxxx|[1-8]xxxx will configure the SPA 112 with the correct dial plan format.
- Choose Network Setup on the menu bar.
- Expand Basic Setup in the left pane and click Internet Settings.
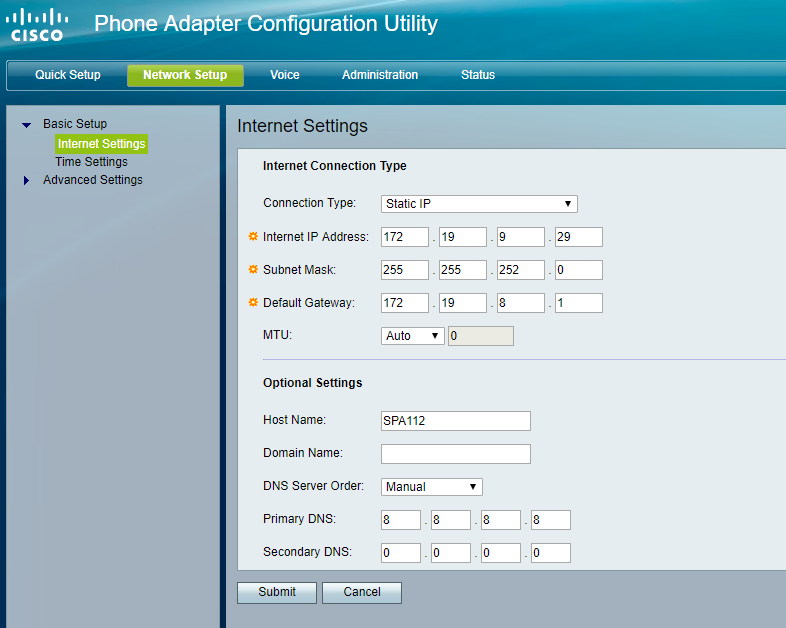
Enter:
- Connection Type: Static IP or DHCP.
- Internet Address: If connection type is set to Static IP, enter the IP address of the SPA 112 on the network.
- Subnet Mask: If connection type is set to Static IP, enter the subnet mask of the network.
- Default Gateway: If connection type is set to Static IP, enter the IP address of the default gateway.
- MTU: Select Auto.
- Host Name: Name of the SPA 112 on the network.
- Domain Name: Name of the network domain if needed.
- DNS Server Order: If connection type is set to Static IP, enter the IP address of the DNS server.
If connection type is set to Static IP, click Submit to save your changes.
- Choose Voice on the menu bar.
- Select SIP in the left pane.
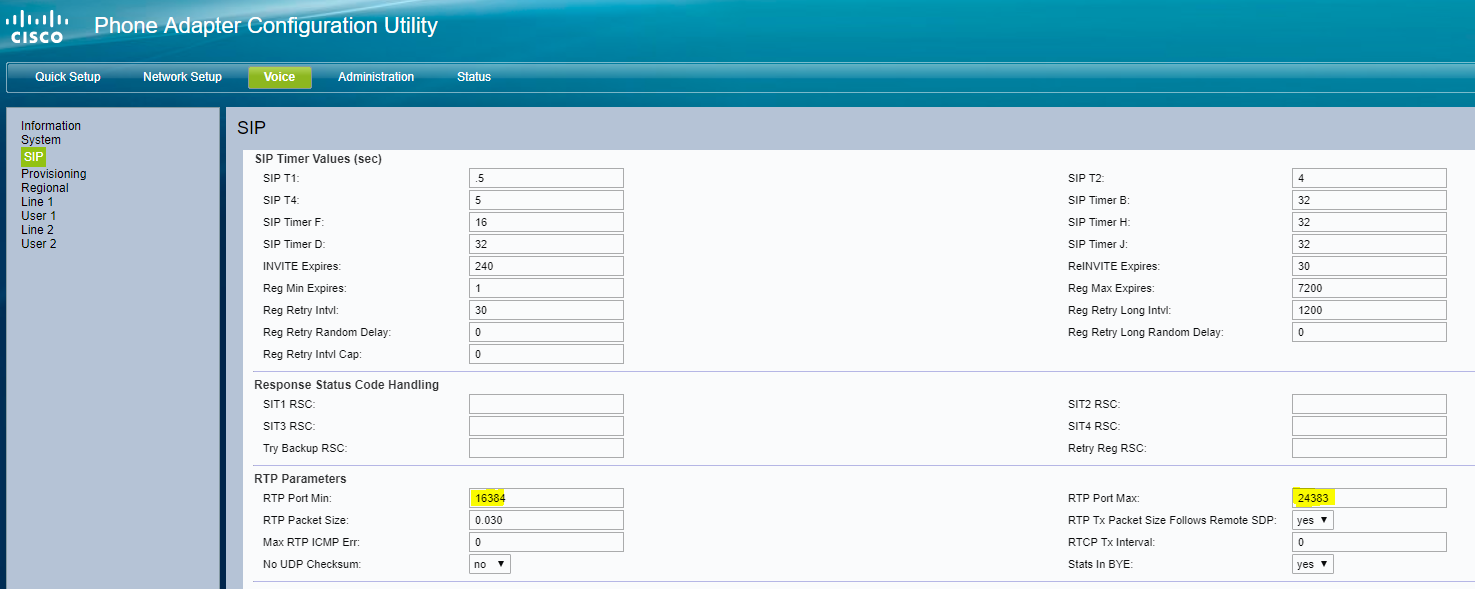
For RTP Parameters, adjust the RTP port range:
- RTP Port Min: 16384
- RTP Port Max: 24383
- Select Line 1 in the left pane:

For General, enter:
- Line enable: yes
For Network Settings, enter:
- NAT Keep Alive Enable: yes
For SIP Settings, enter:
- SIP Transport: UDP
- SIP Port: 5060
- EXT SIP Port: 5060
Scroll down to Proxy and Registration:

Enter:
- Proxy: IP of SBC 66.171.194.10
- Register: yes
For Subscriber Information, enter:
- Display Name: Extension number used for the SPA 112.
- Password: Password entered when this user was created in User Setup.
- Auth ID: Authentication ID displayed on the user's Device tab in the Manager Console.
- User ID: User ID displayed on the user's Device tab in the Manager Console.
Scroll down to Audio Configuration:

Enter:
- Preferred Codec: G711u
- DTMF Tx Method: INFO
For Dial Plan, using:
- [2-9]11|03|011xxx.T|91[2-9]xxxxxxxxx|[4-8]xx|[1-3]xx will configure the SPA with the correct dial plan format for most customers with 3 digit extensions
- [2-9]11|03|011xxx.T|91[2-9]xxxxxxxxx|[4-8]xx|[1-3]xxx will configure the SPA with the correct dial plan format for most customers with 4 digit extensions
- [2-9]11|03|011xxx.T|91[2-9]xxxxxxxxx|[4-8]xx|[1-3]xxxx will configure the SPA with the correct dial plan format for most customers with 5 digit extensions
For other configurations, please reference your Cisco SPA documentation or contact iPECS Support.
